We’ve asked photographer Beryl Ayn Young to give some tips on making the best of poor lighting situations when taking photos.
We’ve all had them. Those moments where we see the cutest, most beautiful, candid photo opportunity and start snapping away, only to be disappointed with the results that show up on the viewfinder. The pictures are too bright, too dark, too shadowy, or too blurry. You have no clue how to fix the problem, and now that perfect moment you were trying to capture seconds before is lost.
Unfortunately, even the best editing tools can’t help some ‘bad’ photos become amazing. Those ‘bad’ photos typically are ones in which the most important part of the photography puzzle—light—was used improperly. If you follow my tips for dealing with the 5 most common lighting frustrations, you’ll be well on your way to capturing more candid moments on the fly without disappointment.
Problem #1: My photos are too bright
Bright sunny days, when the sun is at its highest, can cause the light to not only look uneven, but also can make the light look extremely harsh, and cause your subjects to squint. Your subject is likely facing the sun head on making the light direct and super bright.

The solution: If you can, try to move to the shade. However, if the area you’re in is completely open, it’s best if you position yourself to shoot facing the sun. This will keep your subjects from staring directly into the light and getting all squinty faced. But keep in mind that shooting into the sun could land you with frustration #2…
Problem #2: My photos are too dark
If you’ve ever had that photo where your background was beautiful, but your subjects were just dark blobs of shadow, backlighting was likely the culprit. When you shoot towards the sun or shoot towards a window your camera will typically try to expose for the brightest and lightest thing.

The solution: Try getting in closer to your subject and taking a portrait style shot. Eliminating as much of the bright background as possible will help your camera to know exactly what you’re taking a picture of and will allow the image to be processed properly.
Problem #3: My photos are waaaaaay too blurry
Image blur can occur for many reasons, but when light is the culprit it’s because there is not enough light getting through your lens. Cameras need light to be able to work fast and freeze movement. Trying to take an action photo indoors without flash, or after the sun goes down, is a recipe for disaster.

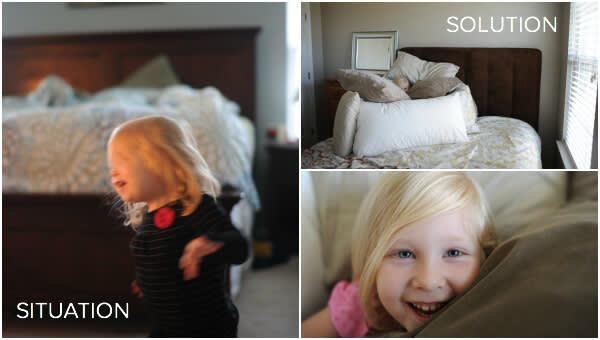
The solution: Sometimes it’s ok to use the flash on your camera to take a snapshot, especially after the sun has gone down and there isn’t natural light available to allow your camera to freeze the action. But indoors, during the daytime, you need to seek out the light! Shoot in the best-lit rooms with ample windows whenever possible. (I’ve encouraged my daughter to build her pillow forts in our guest bedroom just to get a better shot!) Turn your subject so they’re looking towards the window and allow the light to wash over their face. Also, try to shoot in rooms with light colored walls because that will allow the light to bounce all around the room and help your camera work faster.
Problem #4: My images are all splotchy
This frustration typically happens when photographing in one of three scenarios: in the woods where dappled light streams through the trees; in the middle of the day when the sun is overhead and casting strange shadows on objects; and indoors where window blinds make lines across your subject. Direct light casts harsh patches of bright light and dark shadows on your subject.

The solution: Try to find even areas of shade to snap your photos whenever possible. Look at the ground for larger shady areas that are still close to the sunlight and place your subject there. Then be sure to turn them so they’re standing in the shade, but looking out towards the light. If shooting indoors in a well lit room, move your subject farther away from the windows where the direct light casts bright spots on the floor. Then have them face towards the window and shoot again.
Problem #5: My photos are dull and lack pop
I most commonly see dull images happen when photos are shot deep in a shady area, or on a drab cloudy day. The lack of natural light doesn’t allow for any sort of visual interest to play out in the surroundings leading to ‘blah’ images.

The solution: There is good news! Dull photos are the easiest to fix with a bit of editing in PicMonkey. However, if you want to get the photos a bit brighter from the get go, have your subject look up! The sky is where the light is (even if it’s hiding a bit behind the clouds) and looking towards the clouds is a sure fire why to catch a sparkle in the eyes even when the light outside isn’t ideal.
No matter what your situation, it can almost always be improved by finding better light. Hopefully these tips will help you get more winning shots in camera, so you can truly make them shine with PicMonkey’s awesome editing tools once they’re taken.
Happy snapping!
Beryl Ayn Young is a professional photographer by chance and a teacher at heart. Check out her classes and e-books, aimed at helping you love your photos and your life. Then go download a free copy of her digital magazine Compose that will have you crafting the perfect recipe for better photos.
