PicMonkey's giving you a great way to step-up your images: video! You can add video clips to your designs to create ads, how-to's, social posts, and social covers that’ll captivate your audience. Use your own video, or choose from hundreds in our new stock video library from Pexels and Pixabay.
Adding a video to your ads, social posts, or promos is a surefire way to capture views.
If a picture is worth a thousand words, then a video is worth a thousand words times twenty-four frames per second which, depending on the length of the video, is like gazillions of words! So let’s stop talking and watch a video about, well, how to use video PicMonkey:
Using video in designs
Make a video ad by starting with a Facebook Ad template
Did you know that video social media posts and ads receive two times the clicks as still images? Because it’s moving, video naturally catches the eye, and the format is ideal for showing how things work in that crucial 3-5 second time frame of capturing someone’s attention as they scroll through the feed.
Make an Instagram ad by starting with a design template
Adding a video clip to your designs in PicMonkey is as simple as adding an image to a design. Here’s how:
Adding a video to a design in PicMonkey
Go to the Photos & Video tool tab on the left.
Select a video from your desktop, or use a stock video from Pexels or Pixabay.
Videos you import must be less than 50 MB.
The video will load onto your canvas to edit with the Video Tools.
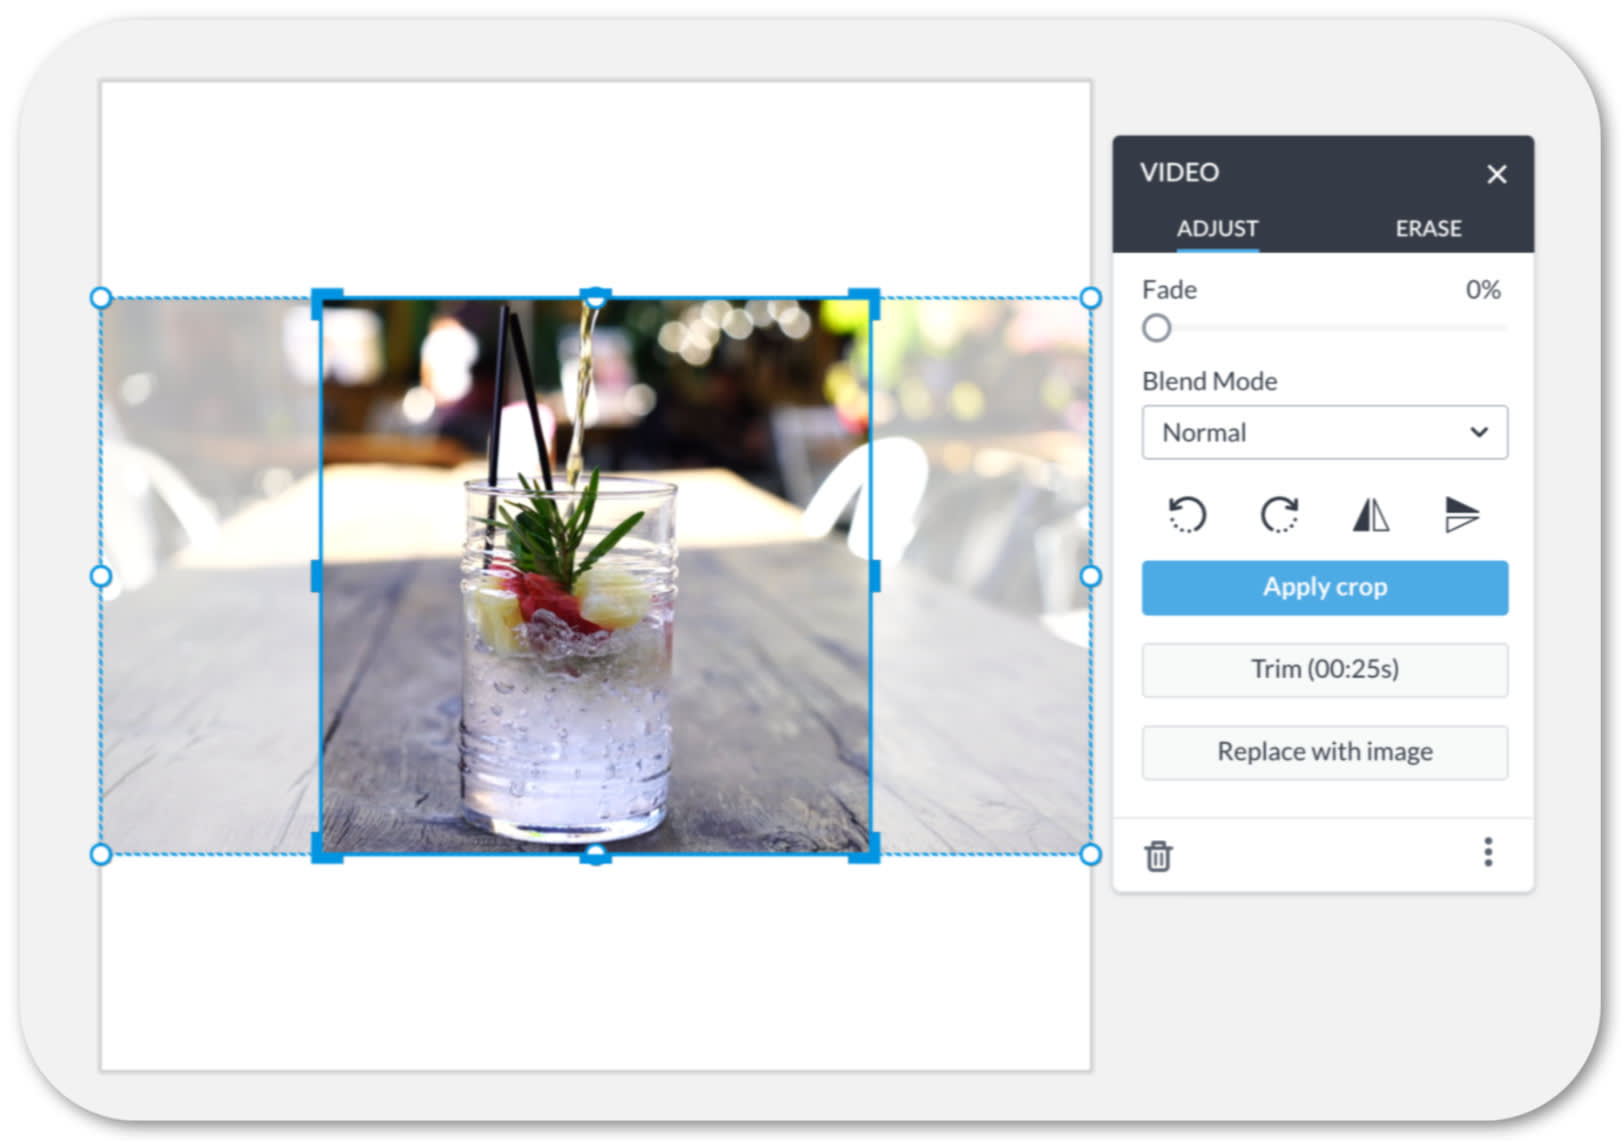
Use Crop on the Video Tools palette to change the shape of your video. Use Trim to remove frames from the front of back end of the clip.
Once you’ve added your video to your canvas, you’ll see the Video tools where you can adjust the size and look of your video. Click Trim video to change the length of your clip by removing frames from either the beginning or the end. Think of your video as a moving picture when you’re designing — if you want to edit video, you’ll need to do that before bringing it into PicMonkey.
To tweak the look of your video, you can move it, resize, crop, rotate, and use the eraser to blur the edges if you like. You can even add multiple videos to your canvas. Try adding text on your video, a polaroid frame graphic, your logo or watermark, and you can also add text to your design.
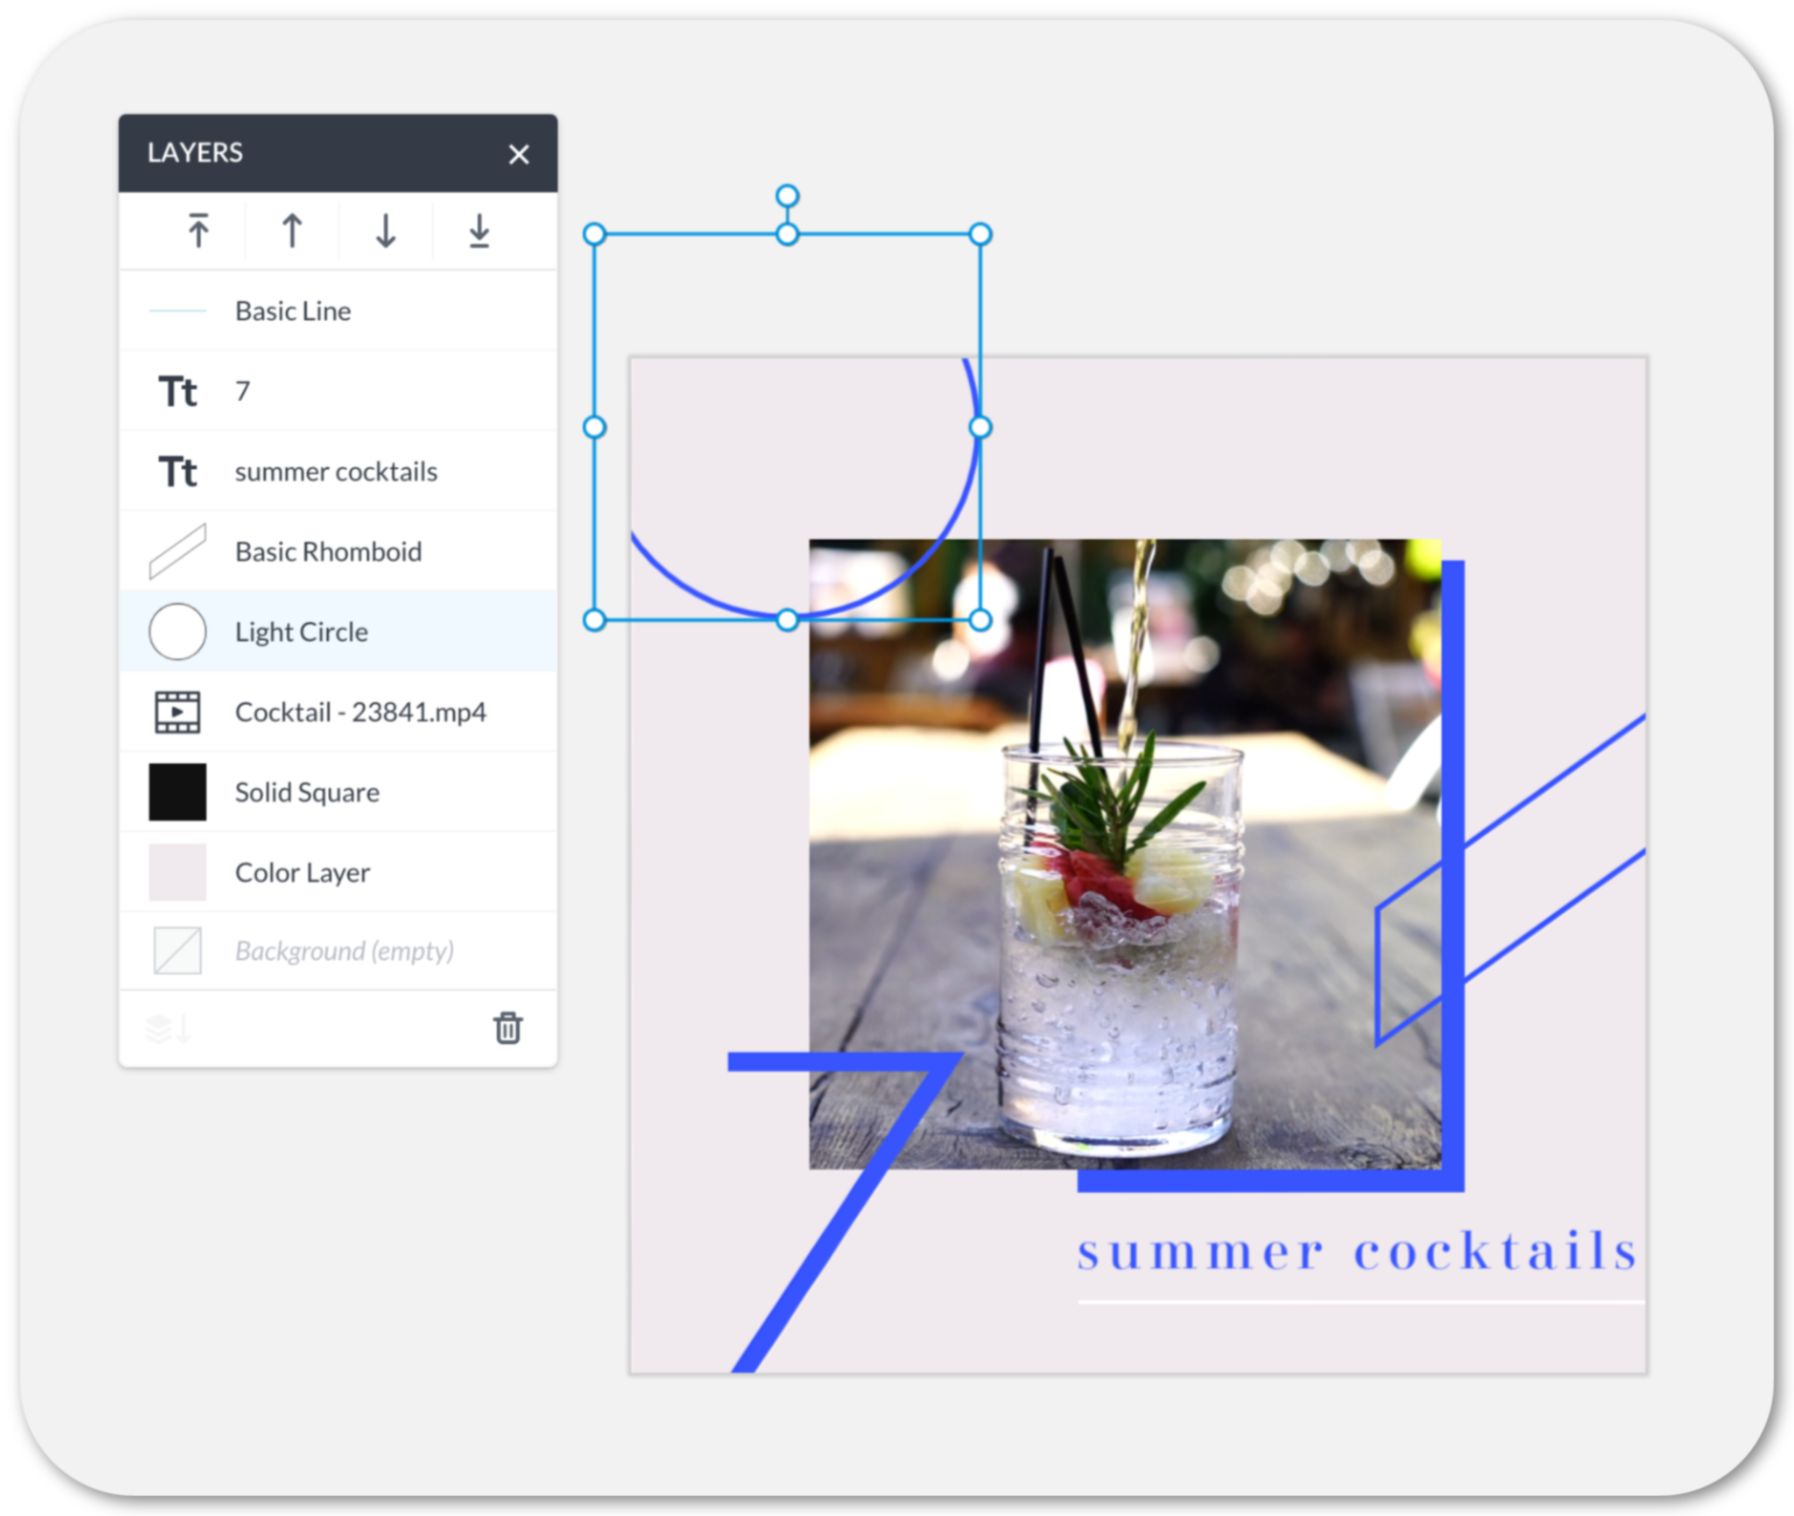
You can add text or graphics to your video design as you normally would in a design with a photo.
Exporting your video design
Download your video as a GIF or an MP4 file. We'll send you an email link when it's done. Now you're ready to upload your video design to social!
Because video files are large, they may take some time to export from PicMonkey. Keep in mind that exporting time depends on the length of your video(s) in your design, and your internet speed—short, small videos will export quickly, larger and longer videos will take a few minutes. If you want to wait for the file to download, go for it, but otherwise get on with your day and we’ll send you an email with a link to your video file when it’s finished exporting and ready to use (we will email the address associated with your account). The link to your video download will expire in seven days, so make sure to grab it before then.
Your design will remain editable in Hub. However, once your download link has expired, you will need to download/export your video once again.
Export videos as a GIF
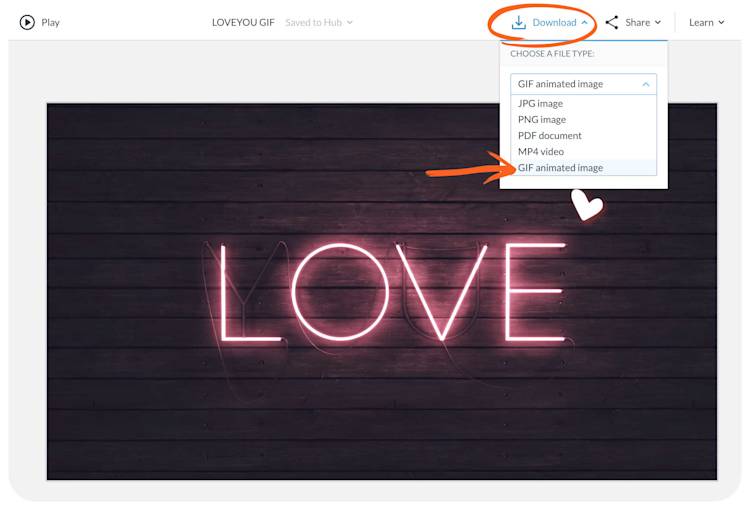
To export your video as an animated GIF, go to Download in the top tool bar and select GIF animated image from the drop down. If your GIF is especially large, you'll be notified that you should download as a MP4 file instead.
You can also upload a MP4 video clip and then export it as a GIF. Generally, you'll want to keep yoru converted MP4's short (~5 seconds or less), otherwise your file will be enormous and will affect load time wherever you happen to use it. Follow the steps above to trim your video to a shorter length to ensure that your GIF will export at a reasonable size.
Best practices for using video in PicMonkey
Keep it under 50mb: For the moment, videos must be 50mb or smaller to be uploaded.
Use MP4 videos when possible: PicMonkey will accept other video formats, but we will have to convert them to a format our editor understands. MP4 videos will upload the fastest.
Videos larger than Full HD will be downsized: This means that videos with dimensions that are larger than 1920 x1080 px will still be accepted, but the quality of them will be lowered. And on export, they will max out at 1920 px on the longest side.
If you want to combine multiple clips together into one video, do that outside of PicMonkey first.
Video will not maintain a transparent background when exported. If you output a video with a transparent background, it will appear black when the MP4 or GIF is played back.
Import GIFs to to add to your design
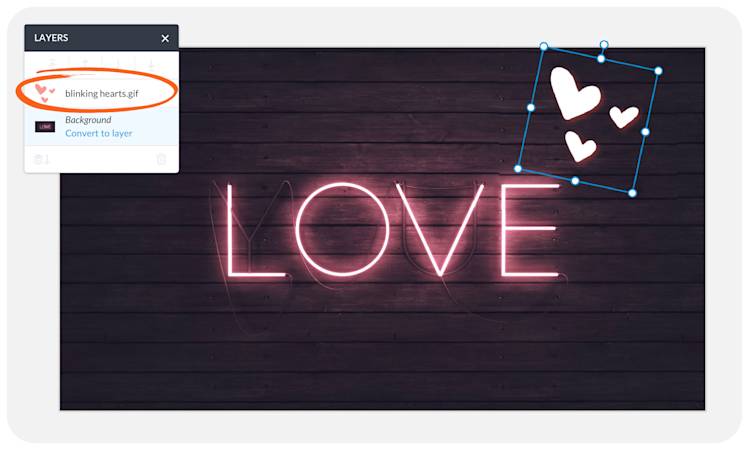
You can import animated GIFs in PicMonkey. Upload an existing GIF just like you would add an image to your canvas. Once uploaded, you'll see it appear as a layer in the Layers panel.
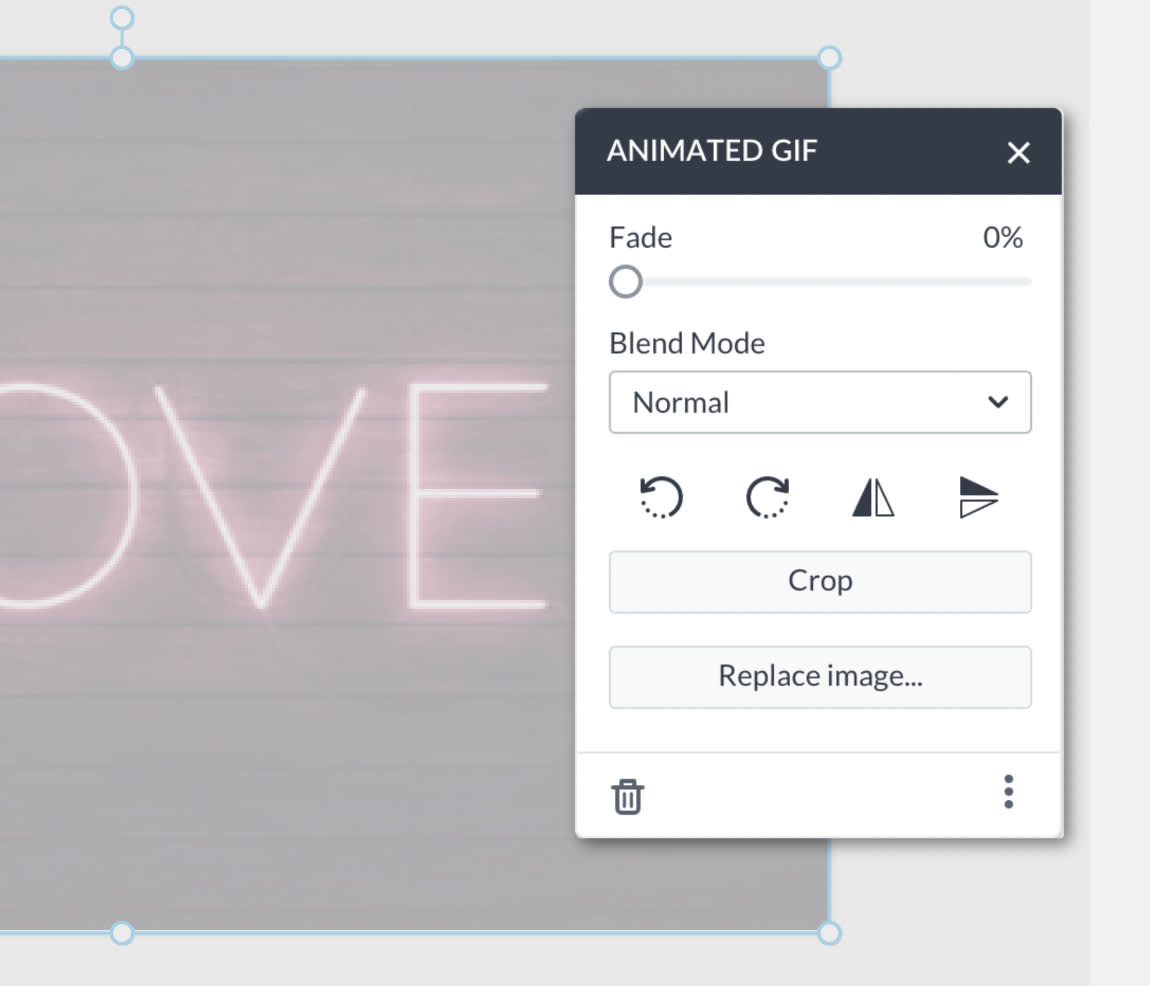
Select the GIF to adjust it using the Animated GIF palette. Like MP4 clips, you can adjust the fade and blend mode, rotate and crop, however you cannot trim a GIF.
Two unique, inspiring Instagram video design ideas
Try layering & partial erase for a dreamy film strip look
To make an Instagram post (or any sized design) like this:
Start with a photo background.
Add a film strip graphic to your canvas and size it how you want.
Add a video and resize/crop it to fit in a film strip cell.
Use the arrows on the Layers palette to move the video back a layer so it's underneath the film strip graphic.
Set the Fade slider to 5% on the Video palette.
Select Erase on the Video palette, move the Hardness slider to 0%.
Erase over parts of your video where you want the photo to peek through.
Repeat steps 3-7 for other film cells!
Use multiple videos & blend modes for a tinted collage look
To create a colorful collage-look like this:
Arrange four square graphics on an Instagram post-sized blank canvas
Change the color of each square—we opted for blue and pink.
Add a video on top of a square, and crop to fit the shape.
With the cropped video selected, choose a blend mode from the Video palette. In this design we used "Screen" blend mode.
Repeat steps 3-4 for each additional square!
