Do you have a sweetheart who’s peachy keen or a close pal who could use a laugh? Or, do your late-night thoughts ever make you stop and think, I wonder how to put my face on a picture with Oprah? You're not alone.
Delight and surprise your loved ones (and only kinda freak them out) with a photorealistic face swap made right here in PicMonkey! Whether or not it's your next great profile pic, it's sure to be a fun project (and still worthy of some social sharing).
Time to learn how to do a photo face swap in just three steps.
Face swap online with PicMonkey
Use these 3 quick steps to swap faces in PicMonkey:
Open a photo with two faces in PicMonkey.
Cut out your faces using Erase.
Place face swaps onto the original image and voila!
Easy as pie! Now, for the real deal. We're gonna be honest with you. We're not partial to apps that face swap online for you. With PicMonkey, you'll:
Boost your skillset learning for yourself
Have more fun navigating your online face swaps
Be in charge of nuanced details
Feel empowered in your creative process
It's the difference between picking a random card off the shelf and making your own. Folks are waaay more interested in your own personal process than paying someone (or something) else to do it for you.
So if you've ever wondered how to put a face on another body without Photoshop or how to gain major face-swapping accolades — y'know, normal things — you're already well on your way. Just start by picking the right photo.
The pic you choose should not only feature the two faces that you want to swap, but both faces should be angled in a similar way. The more similarly positioned the faces are, the more seamless online face swap (and jaw drops) you'll have.
Now, for the deets you've been waiting for: how to swap faces online like a pro.
1. Open your picture
Click Create new on the homepage to open a swap-worthy pic from your computer. If your photo’s already in Hub, select it and click Edit a copy (you’ll want to keep the original file in mint condition for later steps in your project).
When you open a photo in PicMonkey it's locked to the background of the canvas. You need to unlock it in order to cut out the faces which is super easy to do. On the Layers panel click the padlock icon to unlock the photo from the background, making it into its own layer. This prepares your photo for swapization.
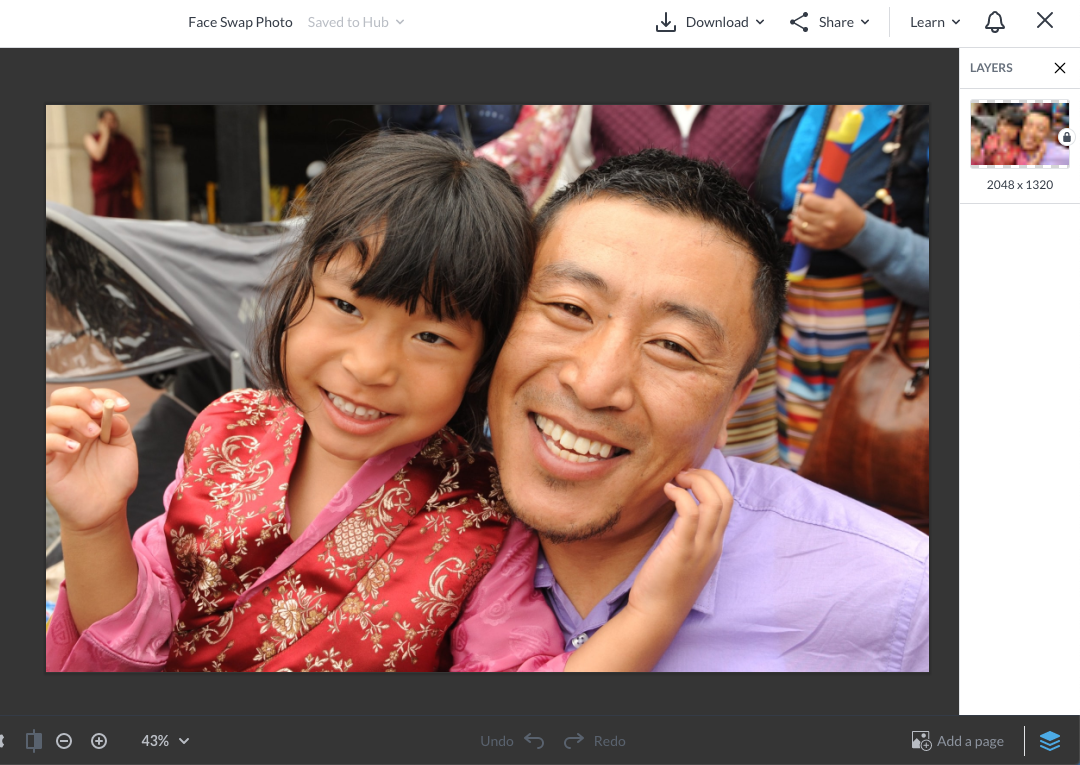
Click the stacked blue squares (pancakes icon) in the bottom right corner to open the Layers palette. Then click the padlock icon to "unlock" the image from the background, making it its own layer.
2. Cut out your faces
Making sure the photo layer is selected, click Erase on the Image Tools tab on the left. In broad strokes, erase everything around your first face. Don’t worry about whether it’s perfect yet. You can always go back and erase more during the next steps.
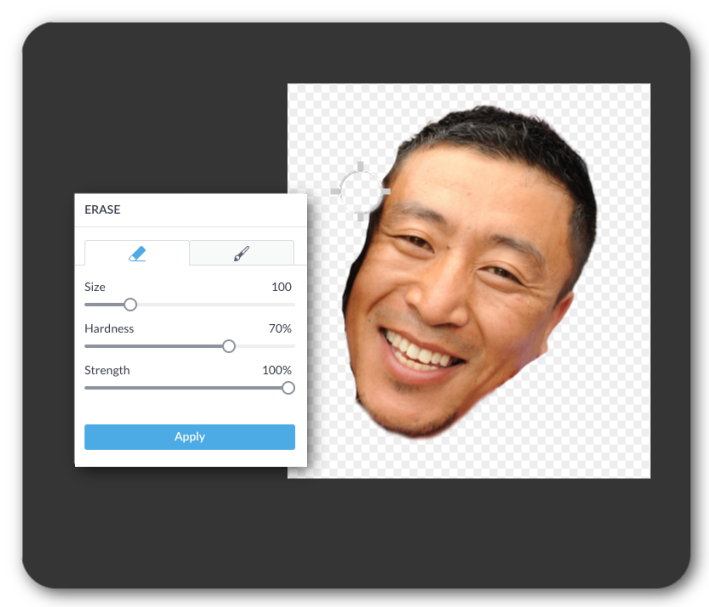
Zoom in on your image to erase in finer detail; adjust the Size slider so you don’t accidentally take too much off. (But if you do, you can always use the brush to paint it back on). You’ll want your Hardness slider to be on the softer side.
Pro Tip: Pro subscribers can use the background remover tool to get rid of the majority of the person's background and then fine-tune with the Eraser tool.
Once it’s looking like a proper floating visage, we can move on to the next one! The isolated face you just made will have been auto-saved in Hub for when you need it later—so you don’t need to do anything to save it. You don’t even need to close it! Just go to the File drop-down in the upper-left of the editor and select Create new to open another copy of the original file in Hub or regrab the original image from your desktop. Repeat the same steps above to extract the second face.
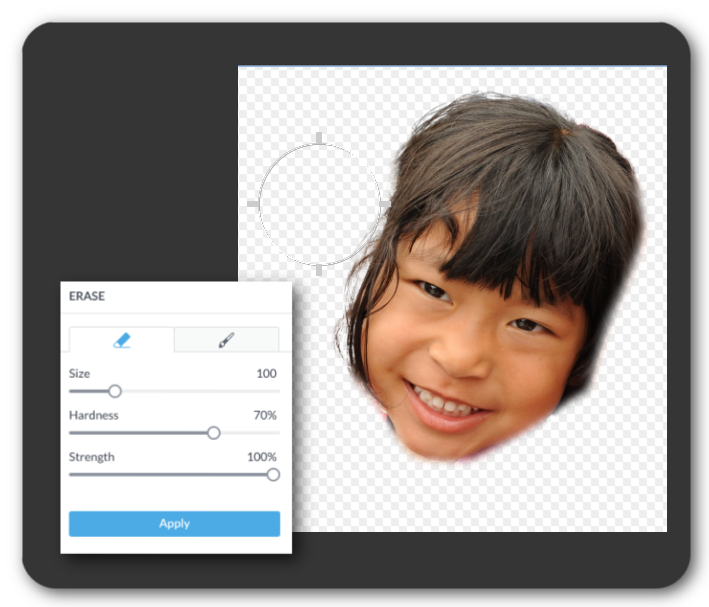
Note: When you’re editing images you’ve stored in Hub, you’ll often want to choose Edit a copy, because the minute you start editing, auto-save will overwrite the original.
3. Place face swaps onto the original image
When both faces are cut out and ready, select Create new again. Open your original image one more time from your computer or create one last copy from Hub. To summon your cropped face files, select Add image on the top toolbar and select Hub. Find your pic and add it.
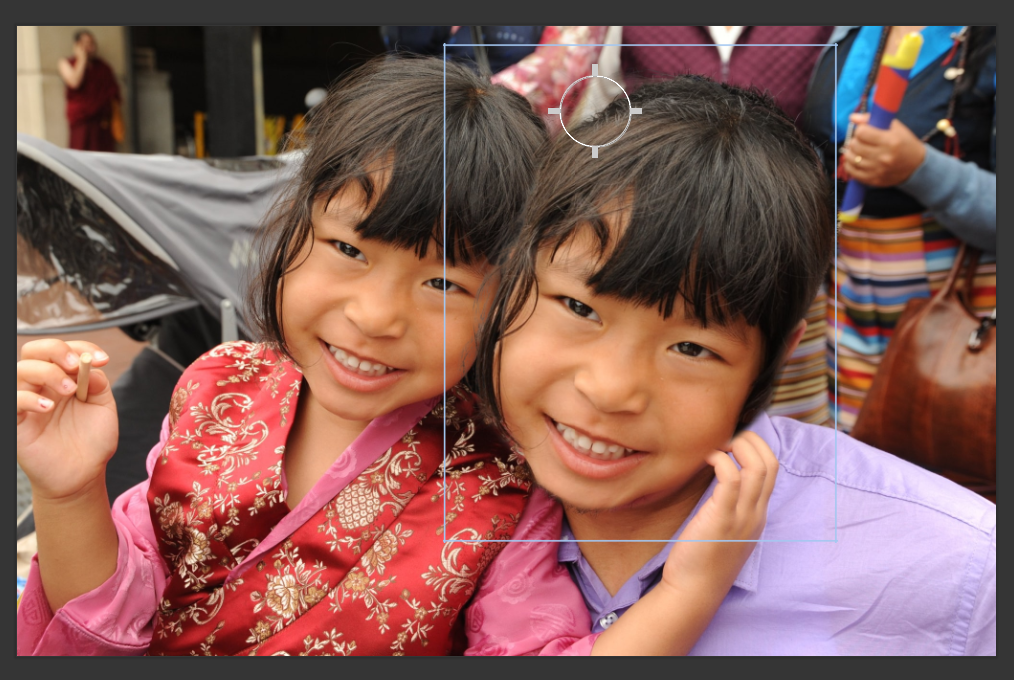
It may not look like it, but your file is now resting on top of the original image. F’real! Click and hold the face to glide it around the place it over the other person’s face. Use the corner handles to size it perfectly. You can use the Fade slider to make the face slightly transparent so it will be easier to line up the features. Turn the top handle to rotate the head so that it’s in the right position.
If the faces are at a slight angle, you may find that flipping a face horizontally (arrows next to the rotate buttons) makes the features look more realistic.
You can also use the eraser to smooth out any edges on the face. For example, if Face #1’s forehead is blocking some of Face #2’s little forehead hairs, use the eraser to shave off some of the overlay.
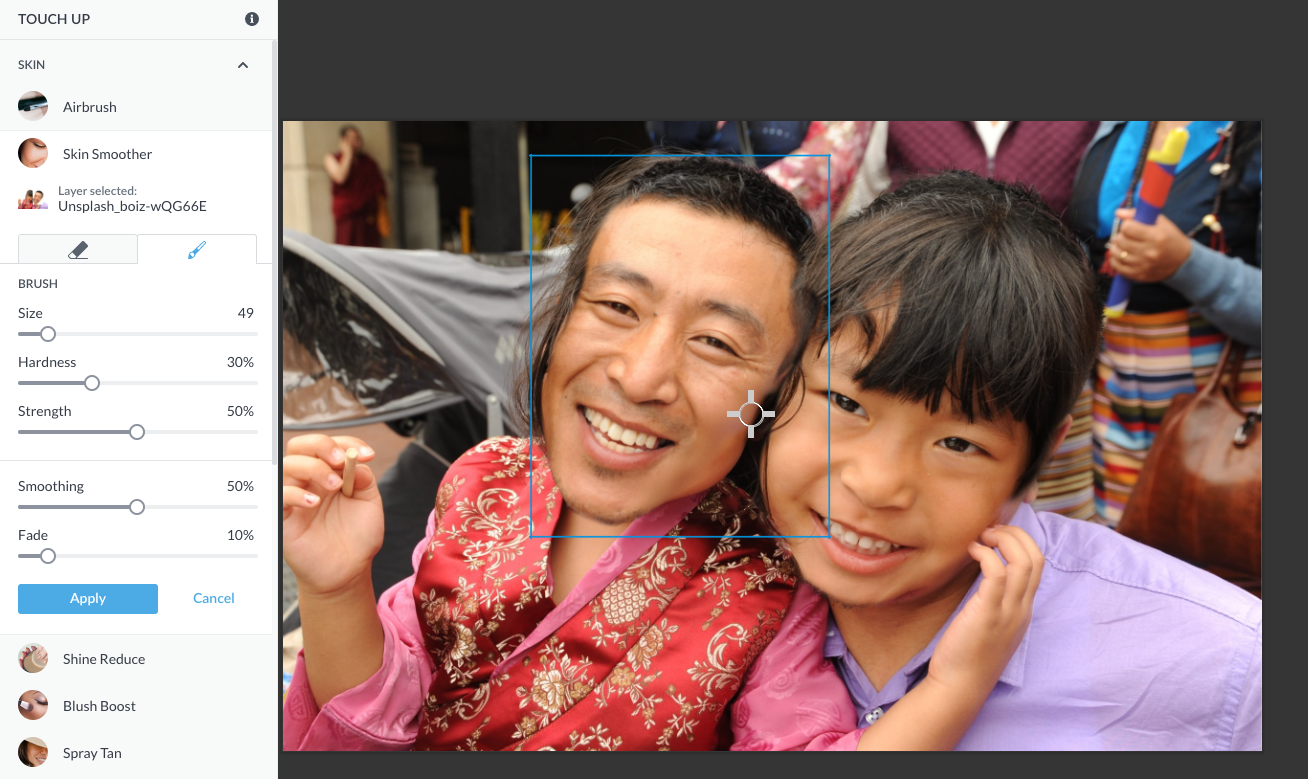
Use touch up tools like Skin Smoother to blend and blur the faces so the seam is less obvious
Repeat this step with the second face. Then smooth the edges one last time with the Erase tool, and take the touch up tools for a spin—try Skin Smoother or Airbrush to help the faces blend together, Spray Tan to match skin tones, or try Highlights to create a similar hair color.
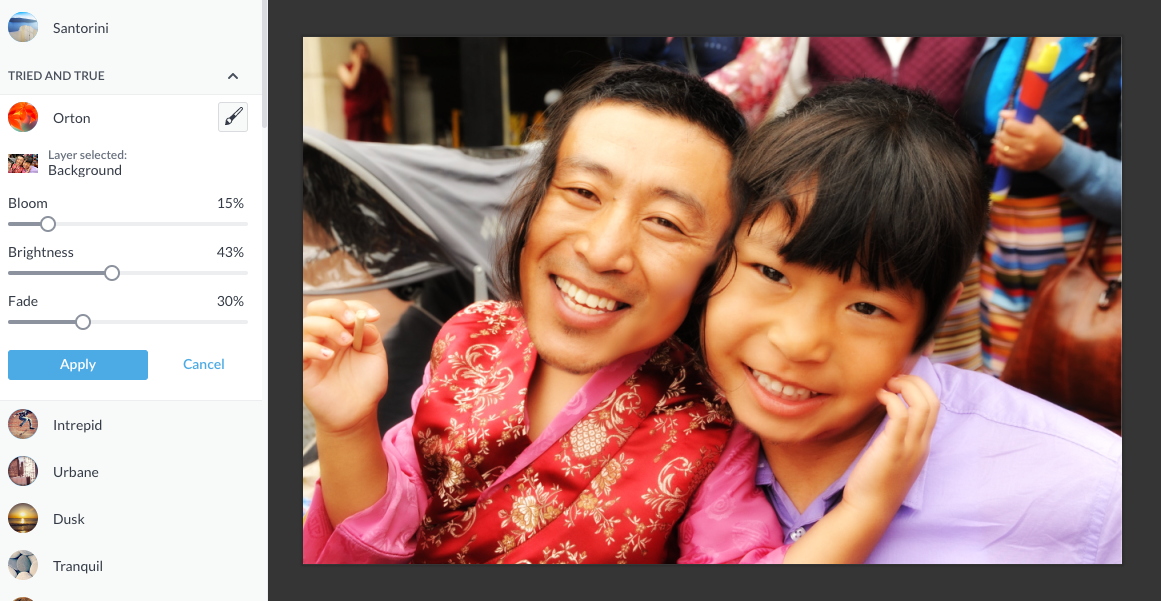
For a finishing touch, try flattening the image and then applying an Effect to the whole thing to pull it all together. Orton is a good choice because it slightly blurs the photo which is forgiving to some of the less-perfect edges.
Wanna change any of the colors around on your photo for an even more surreal look? Just use the Color Changer. The online face swap world is your oyster!
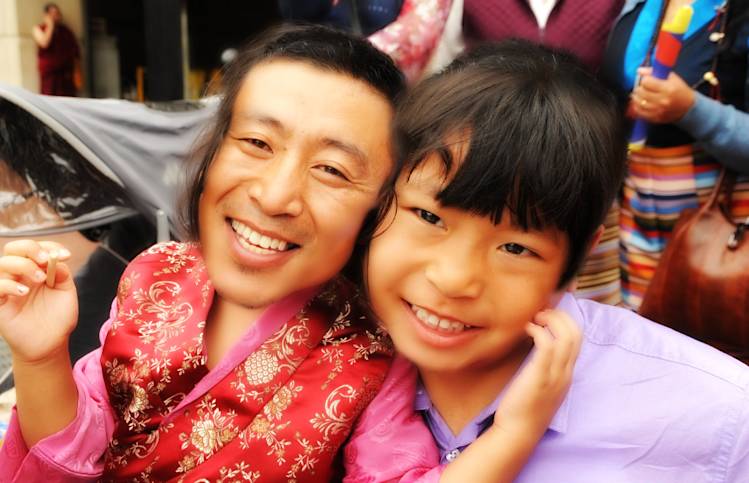
Behold! A face swap so natural, your mom might not even be able to tell which one is really you. (We recommend getting her reaction on camera. You're welcome.)
Become the online face swap master
Caution: Once you perform your first successful face swap online, there are a few natural side effects:
Social media fame
Belly laughs for days
Addictive desire to create more
While creation in moderation sounds good, we trust you know your limits. Why stop at a once-in-a-while online face swap? And while you might leave this humor for outside the workplace, here are some other fun places to sport your faces:
and oh, so much more!
Whether you're celebrating twins in a who's who kinda way or marketing for an upcoming vocal duet with your BFF, online face swaps aren't just for pranks or gags. Get creative and get weird! Make light of your closeness with Mom, your partner, or your pet, and go for it! You'll make a memento for life.
