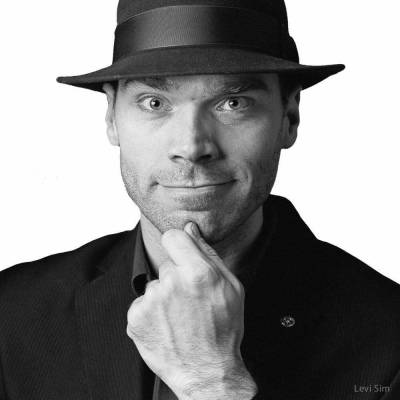
Social media profiles often provide a first impression, which is why profile photos are so important. Your subject needs your help doing two things with their profile pic: First, they need it to look like them on their best day. Second, it needs to be impactful. Let’s explore how to accomplish those goals with a few edits in PicMonkey.
Editing for natural beauty
Your subject will tell you, “Edit it to make me look 20 years younger and 30 pounds lighter.�” Almost everyone says something like this, and you could use the pixel pixies to make it happen. But you wouldn’t be doing your subject any favors—nobody likes meeting people and not recognizing them because their pictures have been edited too heavily.
Really great profile pictures make the subject look their best, while still being recognizable. When you edit with this in mind, you help your subjects see that they don’t need a lot of heavy touching up.
Use editing tools to emphasize the important parts of a face, and mitigate the less desirable stuff. This portrait will guide us through the process.

Start with the eyes
Open your picture in the Editor and use the Zoom slider to focus in on your subject’s eyes. A close zoom makes it much easier to be precise.
Choose Eye Brighten in the Eyes group of the Touch Up tab. Adjust the Brush size slider so that the brush is about the same size as the pupils, and apply the effect to the pupil only. Don’t worry about making it perfect right now—it’s often easier to be a little messy and then use the eraser to clean up the edges.

Adjust the Lighten slider to make the pupils pop. Zoom out and move the slider far to the right, then back left. This helps you understand how the effect alters your image, so that you can apply the just-right amount. Once you’ve got the pupils looking right, click Apply.
In this example, the whites of the eyes look a little yellow. Use the Eye Brighten tool again, but this time, apply it to the whites of the eyes, then adjust the Lighten and Fade sliders.
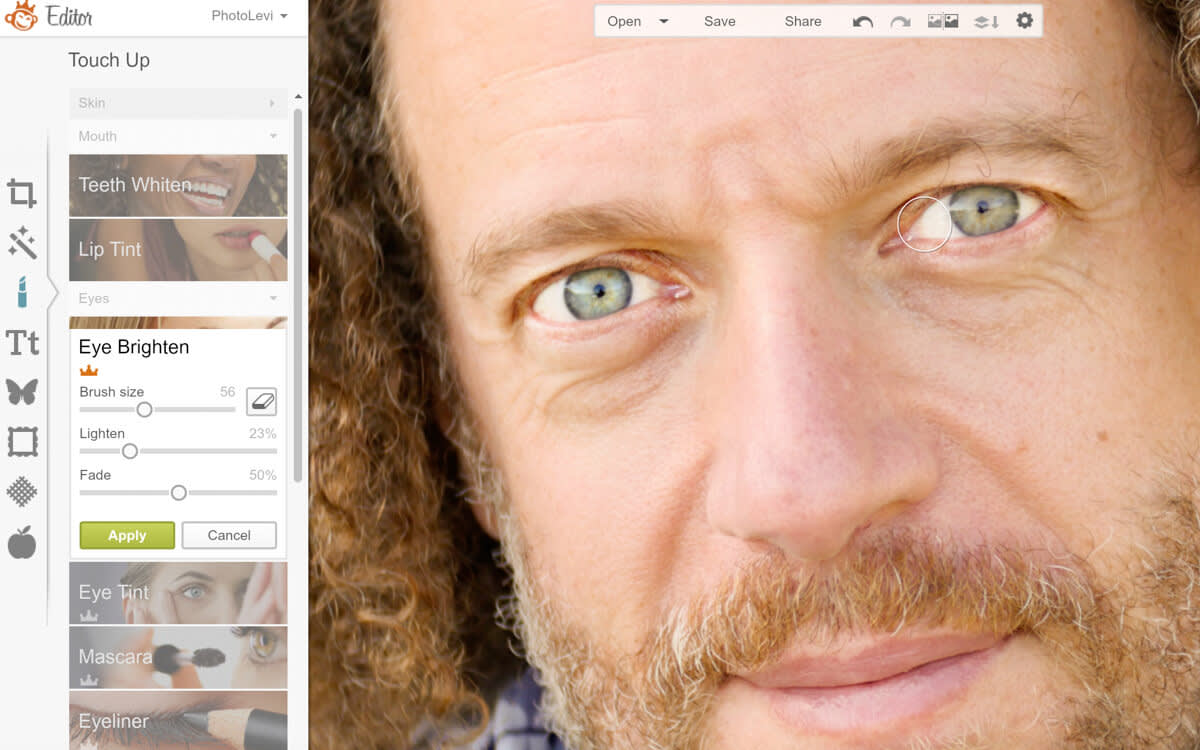
Be careful when adjusting the whites of the eyes—if they’re too bright, they’ll look fake and your edits will be obvious. Adjusting the Lighten and Fade sliders for the pupils and whites separately makes it easier to get a natural look. When you’re all finished, click Apply again.
Blemishes and spots
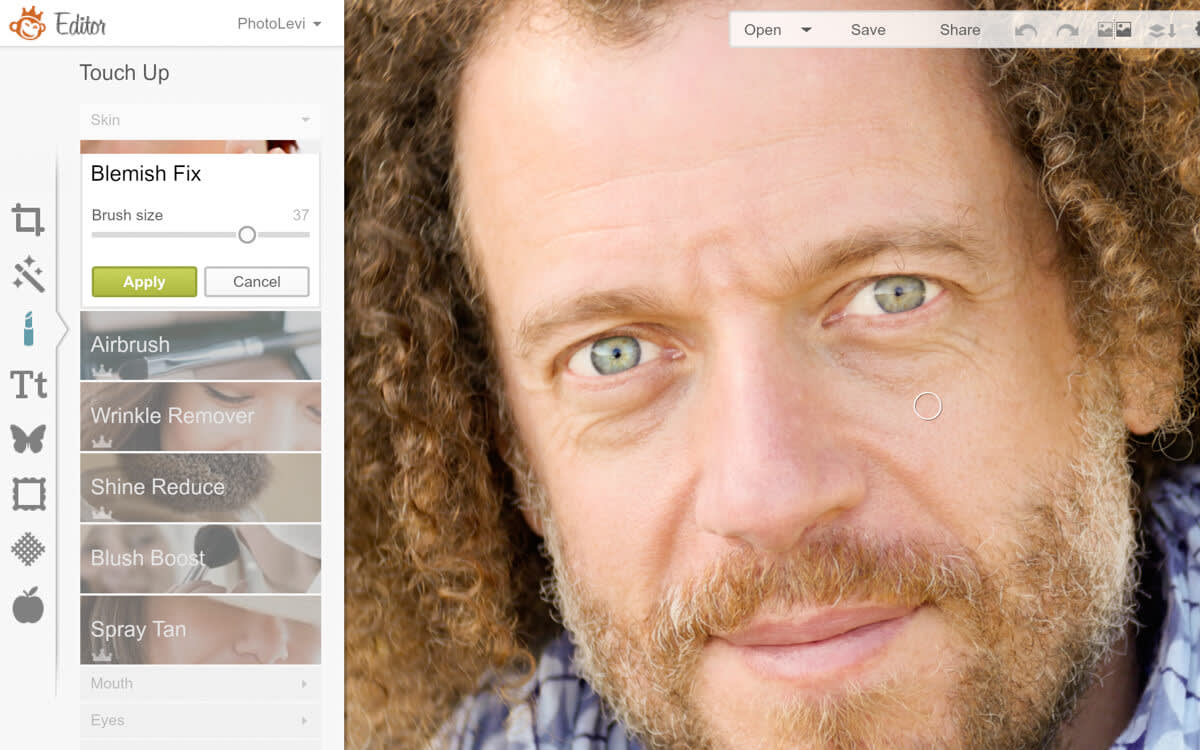
To remove blemishes, use the Blemish Fix tool in the Skin group. This simple tool makes it easy to get rid of pimples and any other temporary imperfections. Adjust the brush size so that it completely covers the problem area, then click on the right spot—that’s it!
Three ways to remove wrinkles
When you’re editing a portrait, go light on wrinkle retouching. You don’t want to remove them completely, since they’re one of the defining features that make a person look recognizable. There are three ways to subtly adjust wrinkles in PicMonkey: Wrinkle Remover, Airbrush, and Clone.
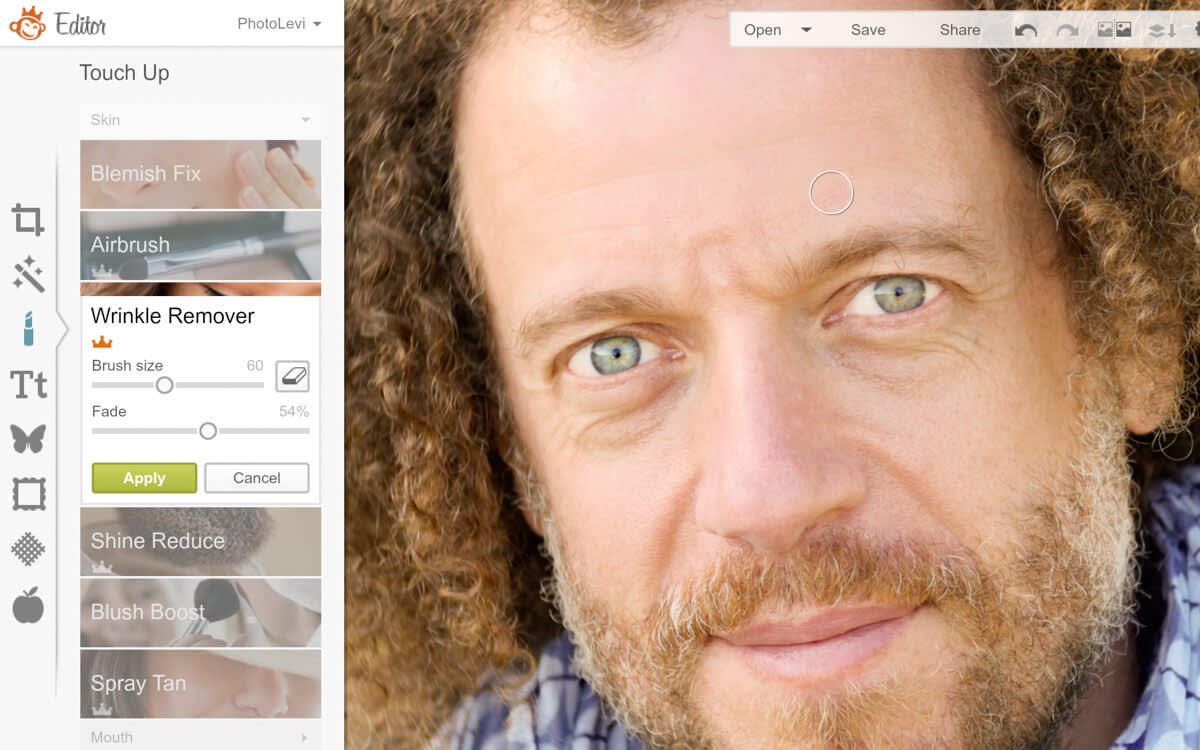
Wrinkle Remover (also in the Skin group) provides natural looking results when the fade is adjusted properly. Use this effect for finer wrinkles, like those on the forehead and at the edges of the eyes.
Just like we did with Eye Brighten, apply it to different groups of wrinkles separately so that you can adjust the fade in each area. About a 50 percent fade looks good in this example.
Airbrush also helps subtly adjust fine lines and skin texture. It’s useful for editing the under-eye area, but be very careful when adjusting the Fade slider—if this effect is too strong, your portrait will look overly retouched.

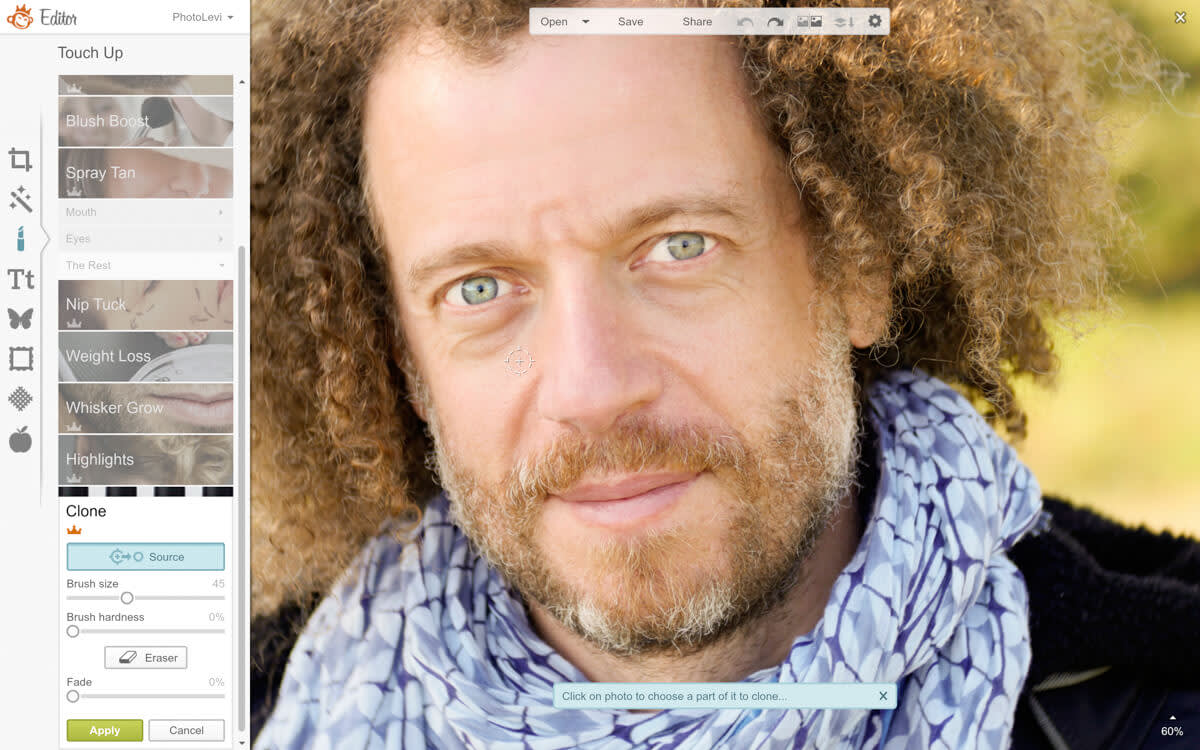
Clone is the most powerful wrinkle-adjusting tool (find it under the effect group called The Rest). It works by copying the texture of one area and painting it onto another. Start by clicking the area you want to copy, and then clicking where you want to apply the texture. If things start looking a little unnatural, adjust the Fade slider or use the eraser to remove the effect from certain spots.
Go ahead and blush
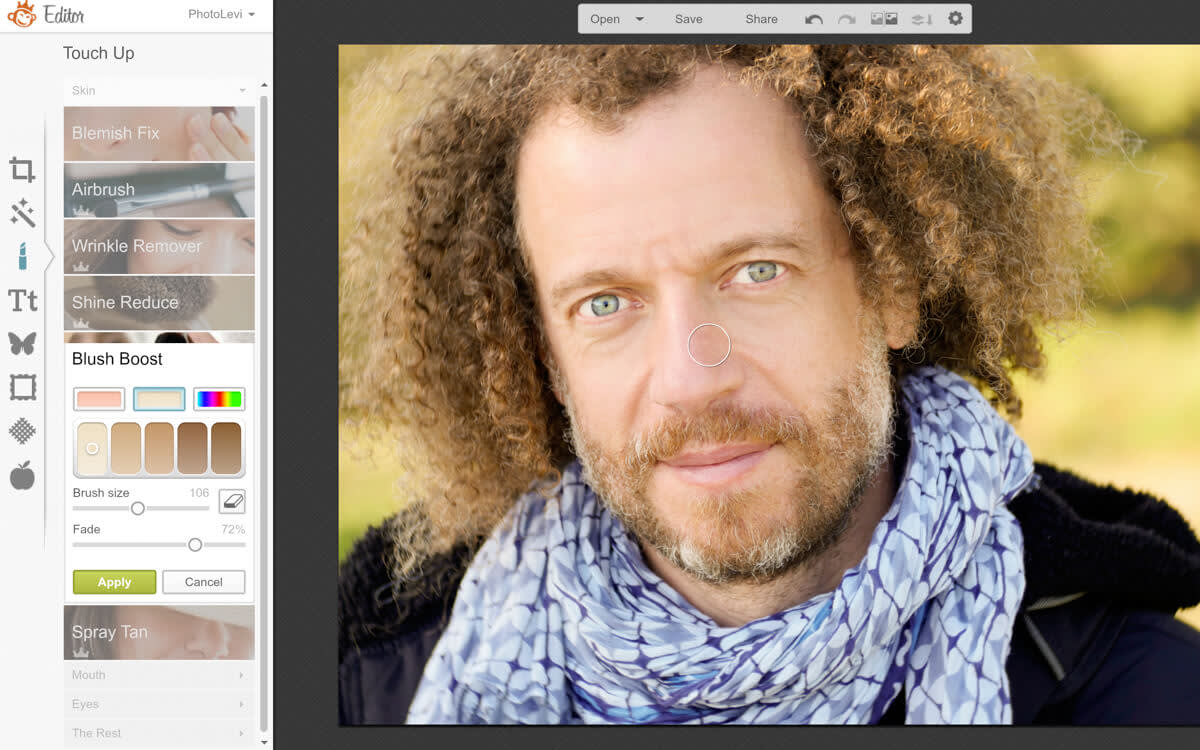
Red blotches show up in a portrait for many reasons. Sometimes it’s windburn or sunburn, sometimes it’s rosacea, and sometimes it’s simply your camera recording the heat (infrared) from a nervous subject. Whatever the reason, the Blush Boost effect from the Skin group can help.
Choose a color close to your subject’s skin tone and apply the effect to the reddish areas, then use the Fade slider to make it look more natural. This fellow’s nose was a little red from the wind, and painting over most of his face homogenized the color. This makes his skin look healthier.
Sharpen
Find Sharpen in the Basic Edits tab and click Unsharp mask. Sharpen makes the photo look—you guessed it—sharper, and the unsharp mask gives you more control than the regular Sharpen tool. Leave the Radius slider set to one, and slide the Strength slider far to the right to see how it changes your image. Bring it back toward the left while paying attention to smaller details like the hair and eyelashes, to make sure they don’t look chunky.

Crop for impact
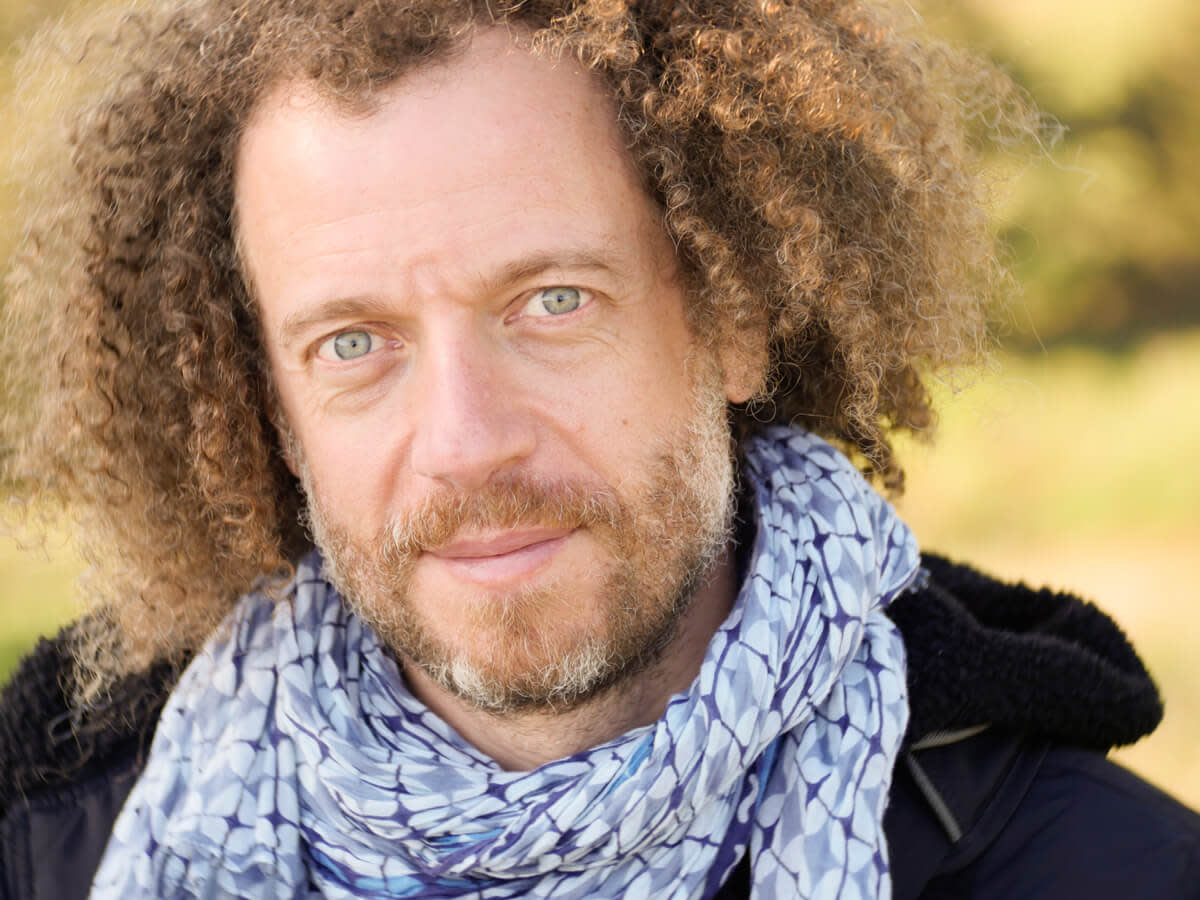
When cropping a portrait, it’s generally a good idea to put your subject’s eyes about a third of the way down from the top, since that’s where people’s eyes tend to go when they look at a picture. Finding the top third of your portrait is easy with the Crop tool in the Basic Edits tab. When you click Crop, a grid hovers over your image and divides it into nine squares. Keep your subject’s eyes near the bottom line of the horizontal row at the top of your image.

Sometimes, getting the eyes in this position means you have to crop off part of the subject’s head. That’s OK—a portrait will have more impact if you crop in close and place the focus on the subject’s eyes and face.
Before

After
Once you’re done retouching and cropping, click Save. Now your subject has an impactful, natural portrait for all of their social media profiles.
