There are two kinds of photographers in this world: those who paint with light, and those who are getting bored. You’re about to become the first, and that means you’ll never be bored again.
Light painting allows you to make a picture at times when it would otherwise be difficult or impossible. You usually need to do it in the dark, and there are two general categories of light painting. The first uses light as the subject of the photograph, and the second adds light to the subject of the photograph.
As a rule, light painting is done with long exposures (this means your camera shutter stays open for a long time). Here are some tips for making both kinds of photos.
Light as the subject
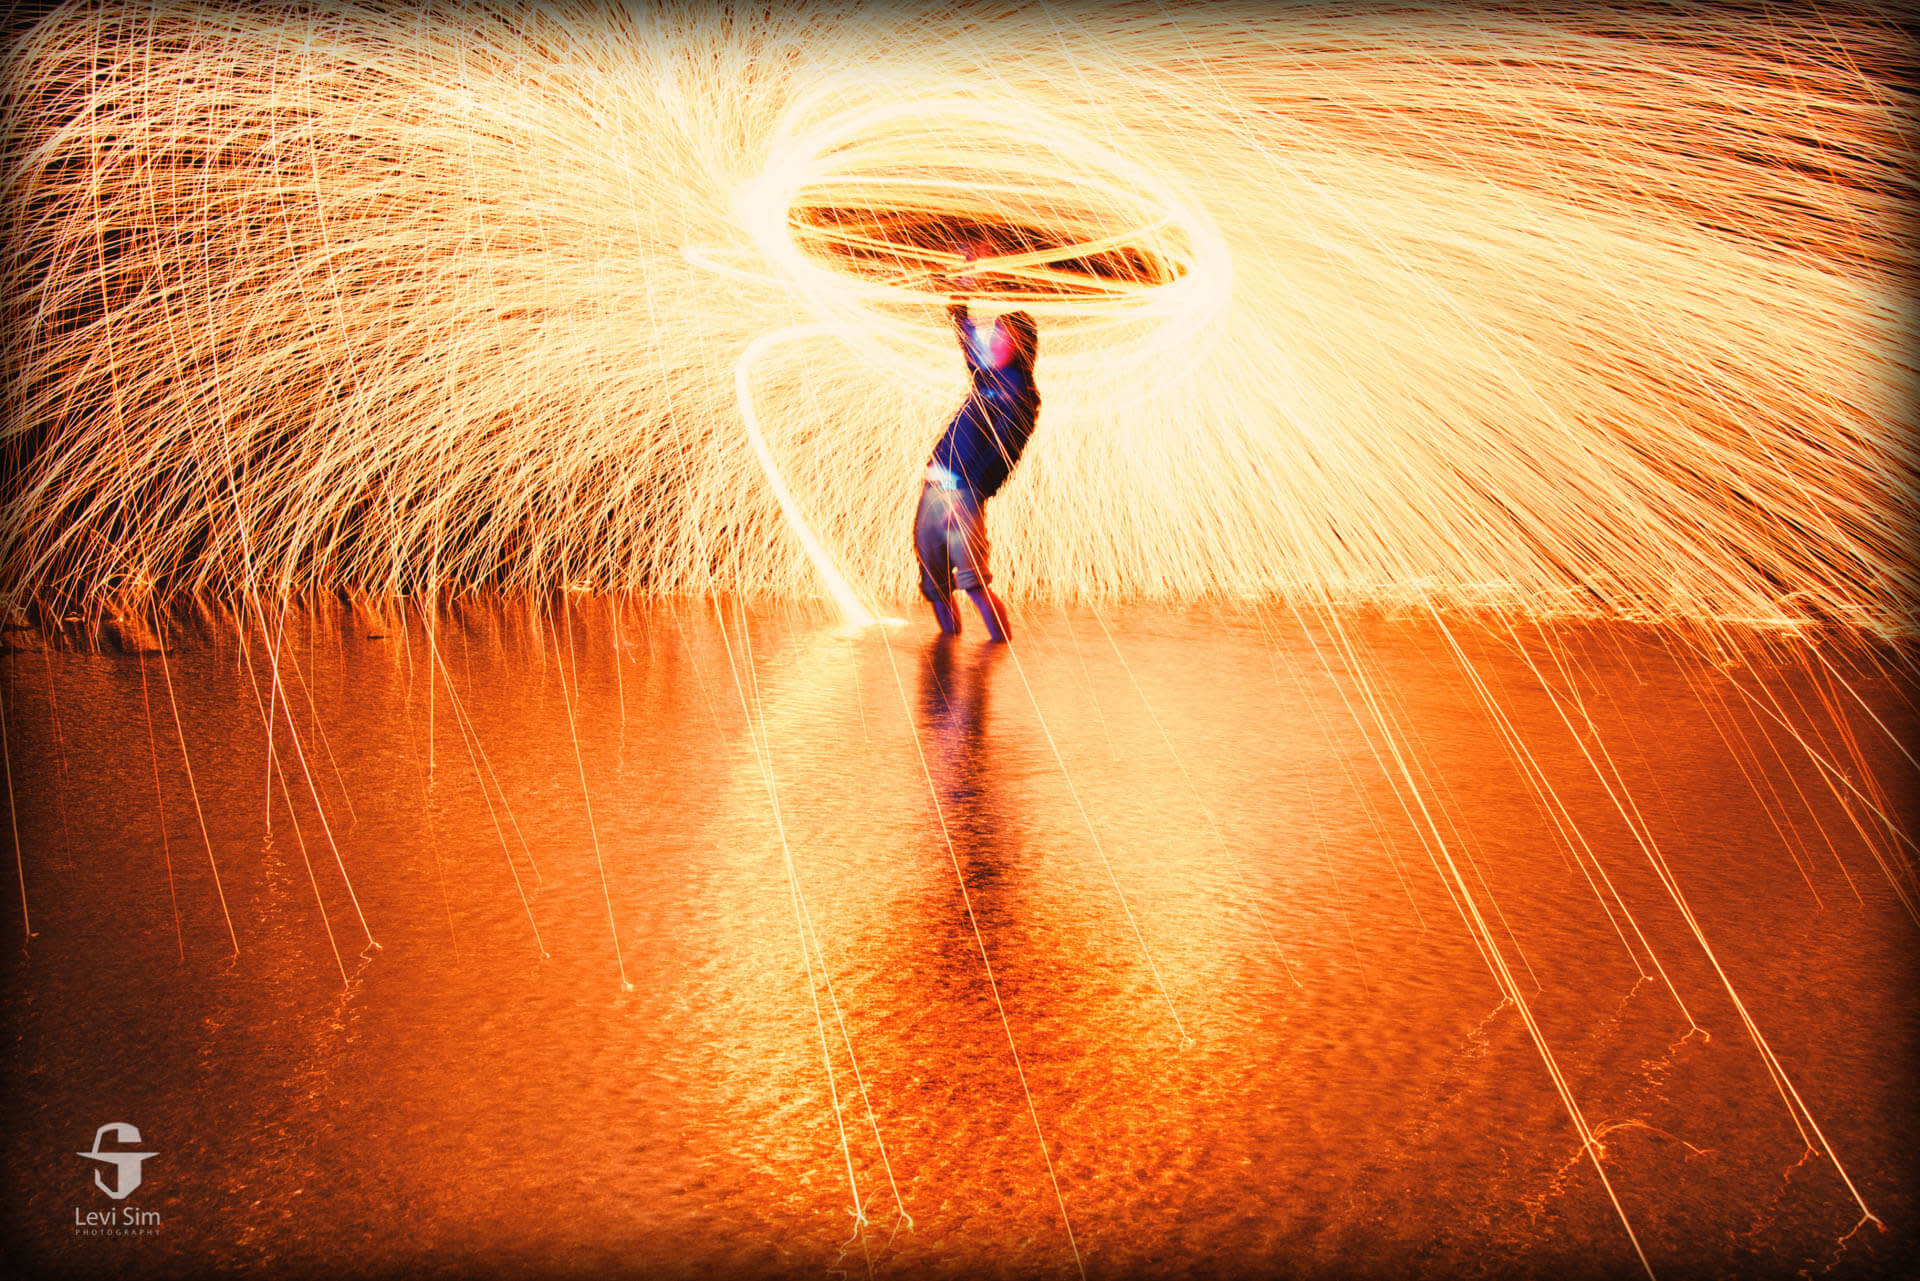
When light is your subject, you can do all kinds of fun things. You can twirl a flashlight on a string and make shapes or write words. You can use your phone to draw shapes, or do any kind of movement with light through your picture.
The key is that you need the shutter open for a relatively long time, like, 10 seconds. Be sure to use a tripod (or a bean bag on a table) so that the only movement is the light itself.

You’ll need to experiment with your exposure settings, but a good place to start is a shutter speed of 10 seconds, aperture set to f/8, and ISO 800. Try to get a good looking picture of the background without light, then add light for the foreground once your settings are good.
If your light streaks are too dark, open the aperture (use a smaller f-stop number like f/4) or increase the ISO to a higher setting such as 1600. If you still don’t get enough movement through the frame, decrease the shutter speed.

This picture was edited using PicMonkey with a little Brightness and Shadows tweaking in Exposure (the Basic Edits tab), a small adjustment of Temperature in Colors, and a touch of Dark Edges from the Effects tab.
Adding light to the subject
This is the original kind of light painting. Basically, you use a flashlight to brush light onto a subject in the dark. The brighter the flashlight or the more time you leave the light on, the brighter the subject will appear in your picture.
The same principles apply with this type of light painting. Start by getting the background looking the way you want and then apply light using a flashlight. Depending on your subject, you may need a larger light source.
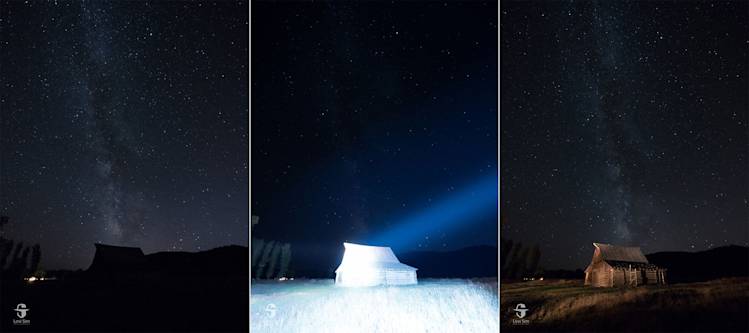
If you’re painting light onto a barn like this one, you may need a powerful gazillion candle power flashlight! As before, experimentation is the key to success as you can see from these photos. The photo in the center has too much light from the flashlight while the one on the right looks much better.

Left: The sky is exposed correctly. Center: Too much light from the flashlight. Right: Just the right amount of light!

The final photograph was enhanced by brightening the stars and darkening the shadows. Perhaps the most important edit was adding a little warmth to fix the color of the barn and bring life to the Milky Way. A little more dodging to lighten the center and some burning to darken the edges and the final image is complete.
Go paint with light!
These examples were all made outdoors, but you can light paint a still life scene in your living room with the lights off, and it’s a great way to practice your photography. You’ll never be bored again because you can practice light painting anywhere.
