Maybe this sounds familiar—you’re trying to capture a breathtaking sunset and everything but the sky looks completely black. Or you’re in a room that doesn’t seem that dark, but from your pictures you’d think you were inside a sealed tomb, well below ground. So what the bananas is going on?! Dark photos are a relatively common problem and we’re here to help you understand why they happen, what steps you can take to avoid them, and how to salvage them.
What factors affect exposure?

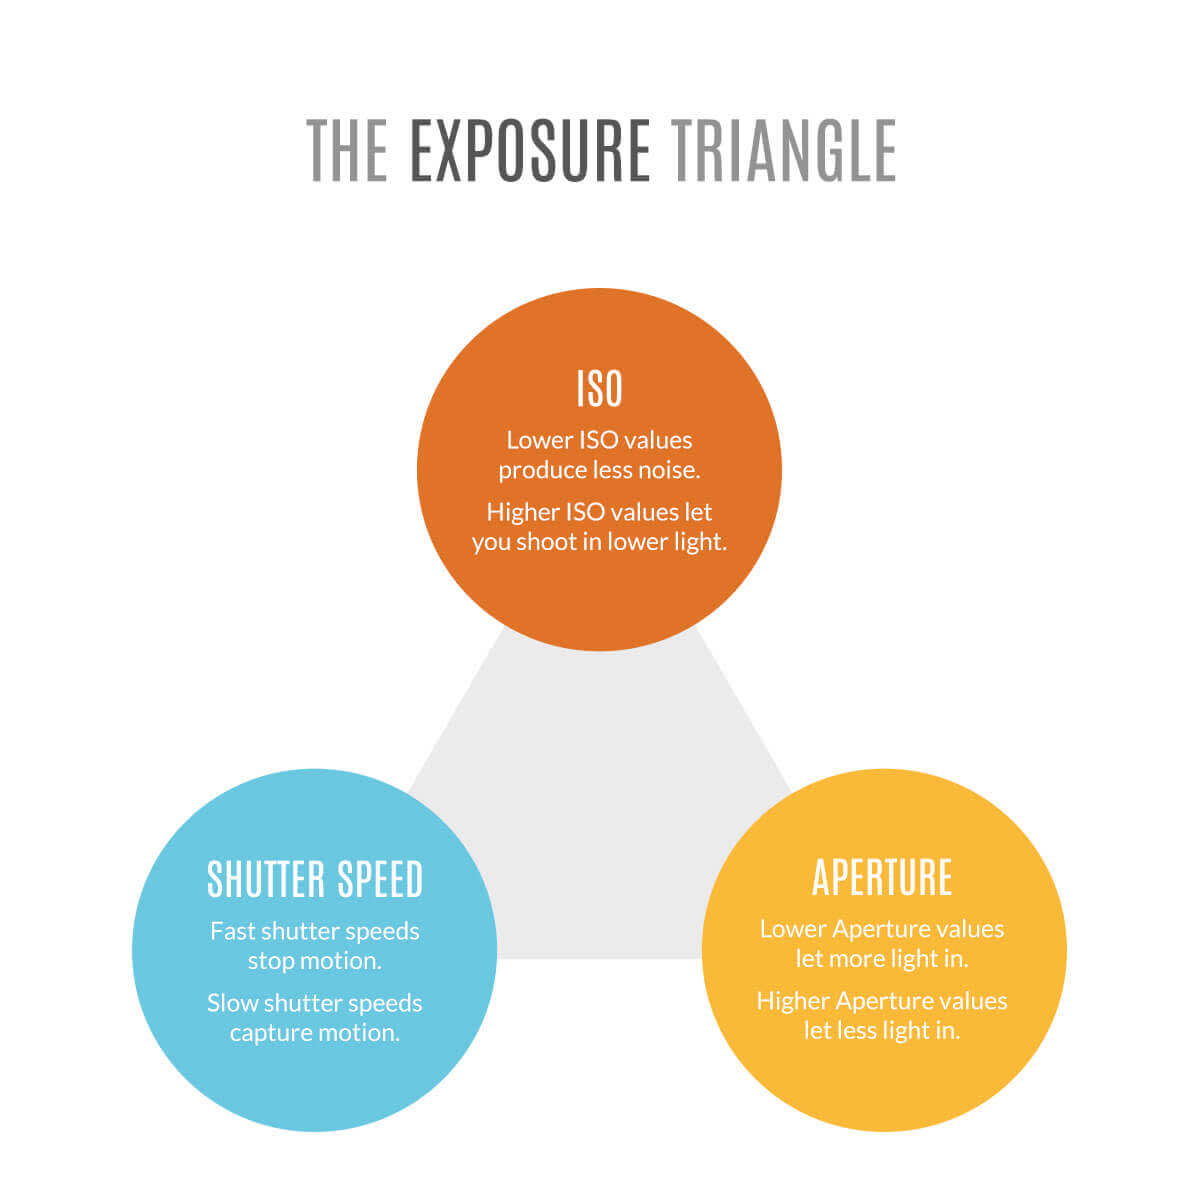
There are three main factors that can impact the amount of light in your photos: aperture, shutter speed, and ISO. Here’s the quick and dirty explanation of how they work:
Aperture refers to how open your lens is. The more open the lense, the more light it can let in. Aperture is measured in “f-stops” and, counterintuitively, the larger the f-stop number, the narrower the lens opening is.
Shutter speed refers to how long your shutter is open. When you take a picture, the shutter opens and allows light to hit the camera’s sensor. The impression the light leaves becomes the picture. Really fast shutter speeds can stop something mid-motion and slower shutter speeds give an image a sense of movement.
ISO refers to how sensitive your camera sensor is to light. When you shoot with a lower ISO, your camera is less sensitive and it will introduce less noise into a photo. Lower ISOs are better for well-lit scenes. Higher ISOs are more sensitive and good for shooting in lower light, but they can introduce more noise into a photo.
Remember that none of these elements exists in a vacuum and if you adjust one of them, it’s going to affect the way all of them behave.
What could go wrong?
Now that you understand the essence of darkness (AKA exposure), let’s look at some of the ways your photos can take a nosedive into the shadows.
Scenarios #1 and #2: You made an easily fixable mistake

Oh, the dreaded forgot-to-remove-the-lens-cap photo.
Dark pics can happen to the best of us. Before you start to panic that your camera is busted, make sure that you didn’t experience one of these common brainfarts:
If you’re trying to shoot a perfectly lovely day and the image in your previewer is pitch black, check if you still have your lens cap on. It sounds stupid, but that’ll do the trick.
Alternatively, your flash may not have fired. If you have a camera with a pop-up flash, this can happen quite frequently.
Scenario #3: You’re shooting a brighter-than-normal scene and your camera doesn’t know how to deal

Don’t let middle grays kill your vibes.
Maybe you’re trying to shoot against a white background, or your yard turned into a beautiful winter wonderland and you want to capture the delight. Instead of looking crisp and bright, you’re left with a dull gray photo. What’s going on?
Cameras are set to expect an average amount of white and black in your image, thanks to their 18% gray cards. This card tells your camera that on average, when you take a picture, it’s going to have 18% gray in it and this helps keep the exposure consistent. However, depending on your lighting situation, you might have more or less gray (for example, if your picture is more black or white). Your camera is still trying to average out the colors in the image, which is why both darker and lighter photos will be pulled more toward middle gray.

Ahhh, much better!
If you’re using a DSLR, you can fix this by manually adjusting the exposure value so that the scene is more exposed.
Scenario #4: You’re shooting in a complex lighting situation

Remember that breathtaking sunset we mentioned earlier? Our eyes are capable of simultaneously seeing a brighter range of lights and colors than our cameras can. When you point a camera at a scene that includes some bright elements and some darker elements, it has to choose what it’s going to focus on. In the case of the sunset, it might be choosing to focus on the sky, while ignoring everything else. (So that everything else becomes, like, black.)

You can get around this by using the different metering modes in your camera. Metering modes help you instruct your camera on which parts of the image to lighten, and which parts can be darker. If you use spot metering, you’re basically telling your camera to focus on one spot in the image, and it can ignore everything else. If you use center weighted metering, you’re telling it that the things in the middle of your scene are more important than everything else. Dynamic metering (also known as matrix metering or evaluative metering depending on your type of camera) breaks your photo into different areas. It then evaluates the exposure in each of them, and tries to figure out which is the most important to you.
Scenario #5: Your camera’s on the wrong setting

There’s a good chance that whether you’re in a weird lighting situation or not, your three exposure settings might not be set correctly.
Maybe you have auto-ISO on and your scene is darker than the pre-set range will accommodate. Auto-ISO is usually to keep your photo from becoming grainy, but in this case it could be causing the photo to be underexposed. It’s always useful to use a tripod to prevent camera shake, but it’s especially helpful if you’re using a higher ISO.

You can use our photography cheat sheet to make sure all your manual settings are where they should be.
Salvage dark photos

All this info is good to know for next time, but what if you already have a dark photo that you want to save? Here’s how to do it in PicMonkey:
Open your photo in the PicMonkey editor by clicking Create New.
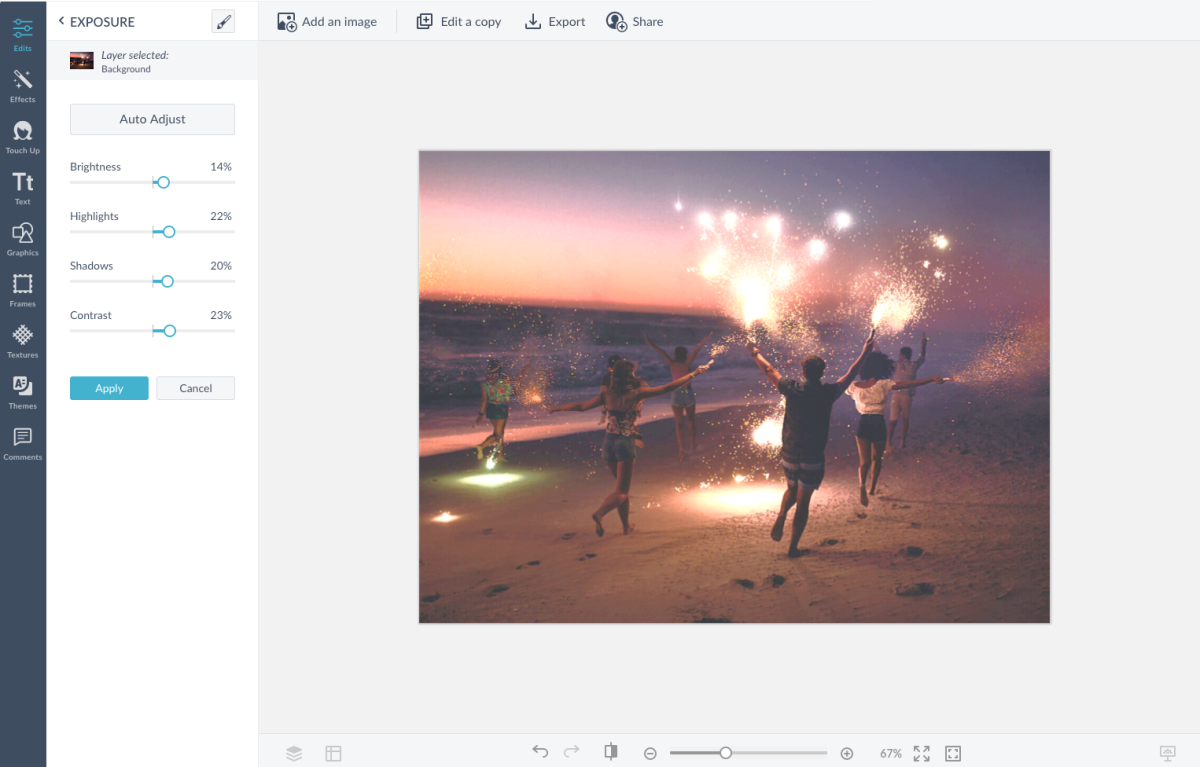
Go to Edits > Basic Edits > Exposure
Use the sliders to increase Brightness, Highlights, and Contrast and to decrease Shadows.
Keep playing with the sliders until you get the look you want.
Add Orton (in the Effects tab) to make your colors more vibrant.
