The Draw tool is accessible from the left tool tab menu. It lets you create drawings freehand using a variety of brush types and styles.
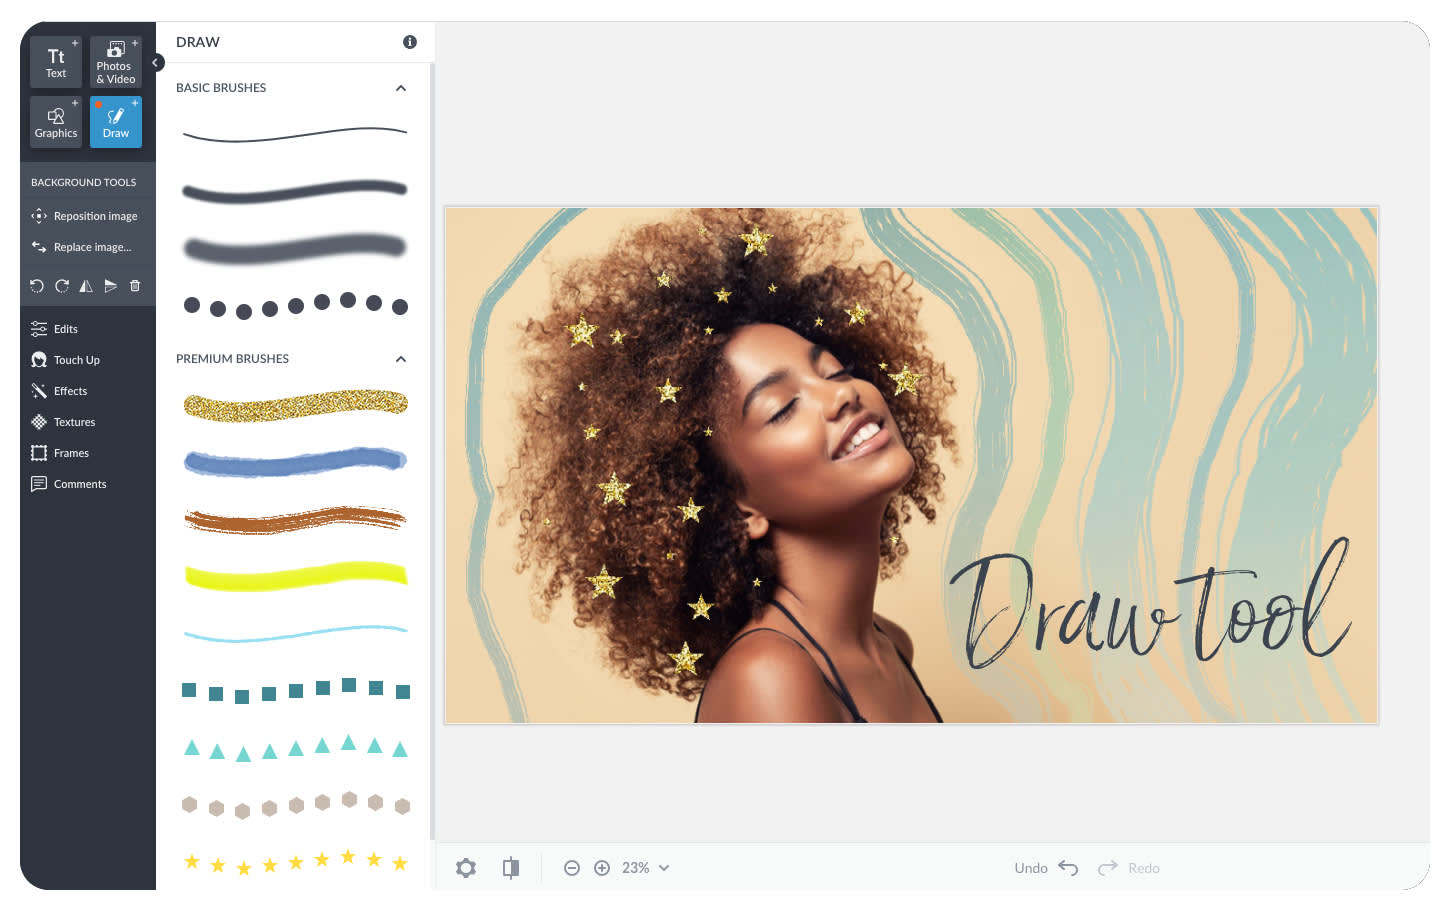
If you're a Basic subscriber, you can choose from Pencil, Paint Brush, Spray Paint, or Circle brushes. The rest of the brushes are "Premium" and only accessible to Pro subscribers and Business subscribers.
How to use the Draw tool
Open the Draw tool from the tool tabs menu on the left (the pencil icon).
Select your drawing brush & the shape of the brush.
Use the Size, Hardness, and Strength sliders to adjust your stroke appearance.
Use the Rotation slider to change the orientation of non-round brushes.
Use the Spacing slider to use the brush more like a continuous line of stamps.
Choose colors from the color picker.
Draw away! When finished, click Apply.
PRO TIP: To draw a straight line, simply hold down shift while you draw.
Brush adjustment options
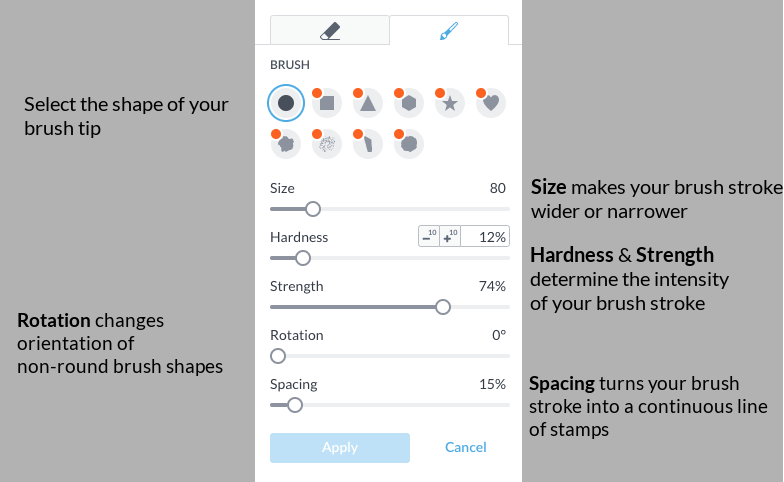
When you've selected a brush you'll now see the adjustment options available to customize your brush stroke. Choose the color, shape, and use the sliders to adjust the size, orientation, and look of your draw.
Note that once you've drawn on the canvas you cannot adjust the look of the brush stroke. Make any adjustments before you draw.
Now your drawing is its own layer
You can also create your own editable graphics with Draw. After you've drawn on the canvas and clicked Apply, the drawing now becomes its own layer. That means you can treat it like a graphic/overlay and change the color or size, apply an image fill, erase part of it, etc.
Change the shape of the Paintbrush & Eraser tools
In addition to drawing right on the canvas using the paintbrush in the Draw tool, you can also change the shape of the Paintbrush or Eraser tools found all throughout PicMonkey.
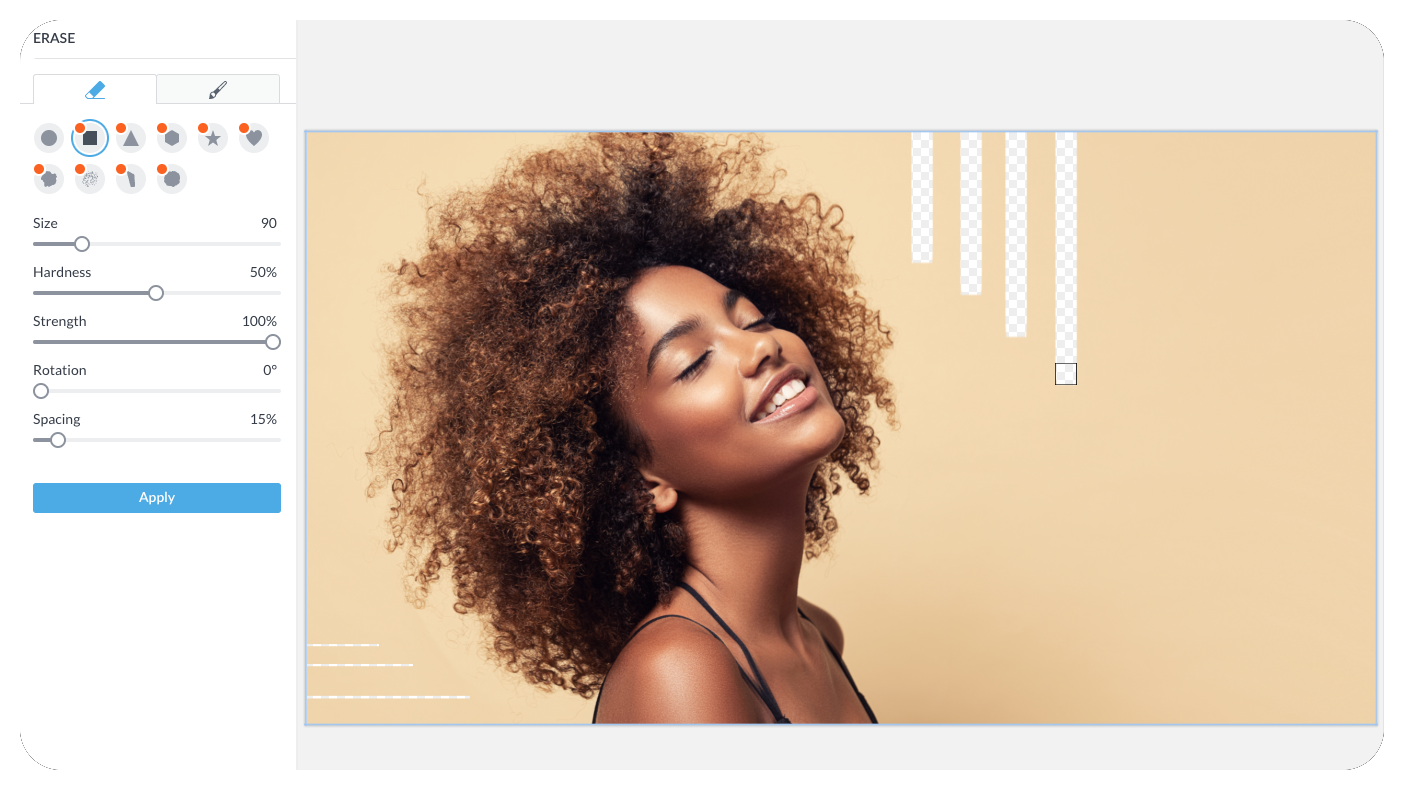
That means you can erase parts of a photo with the square shape. Remember to hold down the Shift key for a perfectly straight line.

Use a star-shaped eraser to "stamp" your image.

Apply a texture, erase part of it with a shape, then check the Reverse effect box to create an a pattern like this.
Shapes are not available in a few of the editor or touch-up tools including: Dodge, Burn, Blemish Fix, and Sculpt.